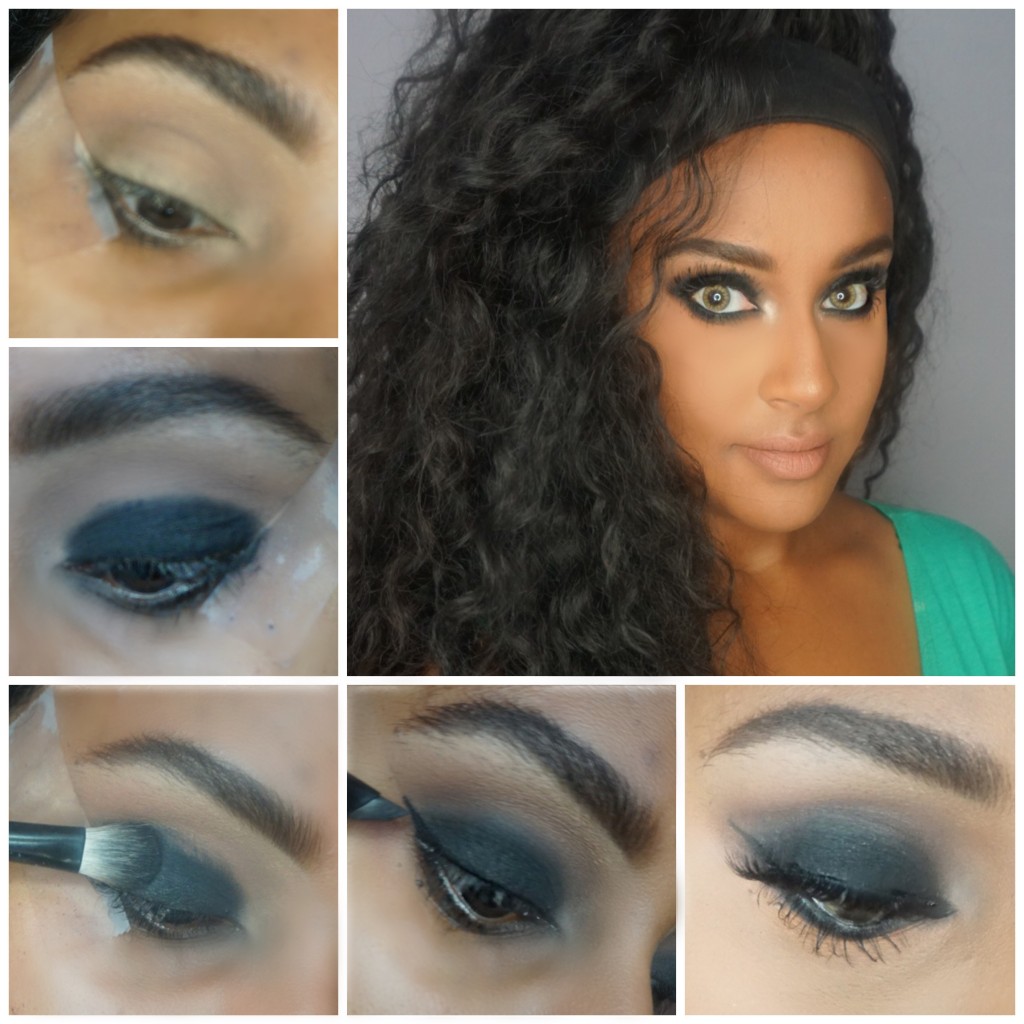
Over the next few months, I'll be highlighting 2015 Fall trends perfect for anyone!
First up, the infamous sexy red lip. Ever try on a red lipstick and it just didn't quite work? When shopping, keep in mind all red lipsticks are not created equal. Finding the right shade for your skin tone can be confusing. When buying lipsticks, it's important you understand your skin tone and the undertones of lipsticks so it works for you. I have included a few swatches and descriptions for my go-to favorites. Also listed is a guide to helping you find the perfect red lipstick for your skin tone. Please keep in mind this is just a guide (there are no definitive rules to makeup). If you love it, ROCK IT! Nothing is sexier than confidence.
1. Armani 504 - lip stain, a berry red, silky, will dry matte (must be worn with liner it will bleed recommend Mac Cherry liner) not drying, lasts forever
2. Armani 400 - lip stain , must be worn with liner to keep from bleeding, red, feels silky, matte but is not drying as above Armani has the best lip stain formula
3. Mac Ruby Woo (both Mac Cherry liner and with Nightmoth liner pictured) -Darkened great for fall as well. I lined just the outer corner of my mouth to create an ombré affect with Nightmoth liner.
Both Mac Ruby Woo and Riri Woo are beautiful. Ruby Woo is a little dryer but the colors don’t look all that different in my opinion.
4. Nars Cruella -brownish red (beautiful fall color) Matte color
5. Nyx Pure Red - Orangish red, good drugstore alternative
From Pinterest

Rock your red lip this fall! Tag #embracingbeautybysara on Instagram and #WagsRedefined on Facebook and Instagram so we can see all of your looks.
Xoxo Sara